Transform Your Home into a Luxurious DIY Hair Spa Retreat
Create an Inviting Ambience for Your Hair Spa Experience
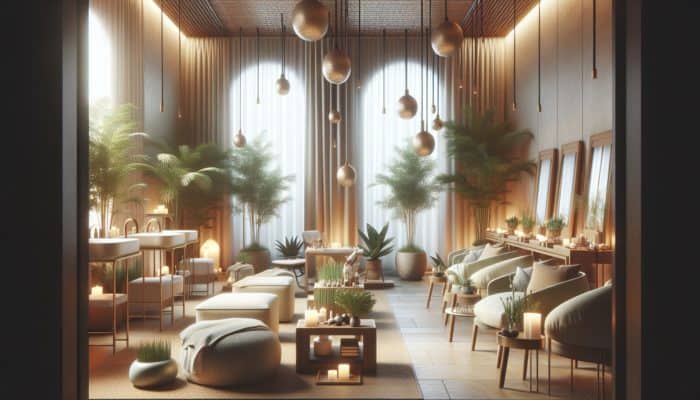
How to Do a DIY Hair Spa at Home: Creating the ideal atmosphere is essential when embarking on a DIY hair spa at home. By transforming your surroundings into a tranquil sanctuary, you can significantly elevate your spa experience. Dim the lights and opt for soft, warm lighting that mimics the glow of natural sunlight, fostering a sense of calm. Enhance the ambience with scented candles or essential oil diffusers featuring relaxing aromas such as lavender or chamomile, which can help to relax your mind and body. Additionally, create a soothing playlist featuring gentle instrumental music or calming nature sounds, allowing your auditory senses to unwind.
Furthermore, take the time to declutter the area designated for your hair spa. A tidy, organised environment can significantly reduce stress and enable you to focus entirely on the luxurious pampering that lies ahead. Consider incorporating soft cushions or a plush chair where you can comfortably sit while treating your hair. The objective is to create an inviting space that allows you to escape from the everyday hustle and bustle, ensuring a rejuvenating experience.
Assemble Essential Supplies for Your Hair Spa
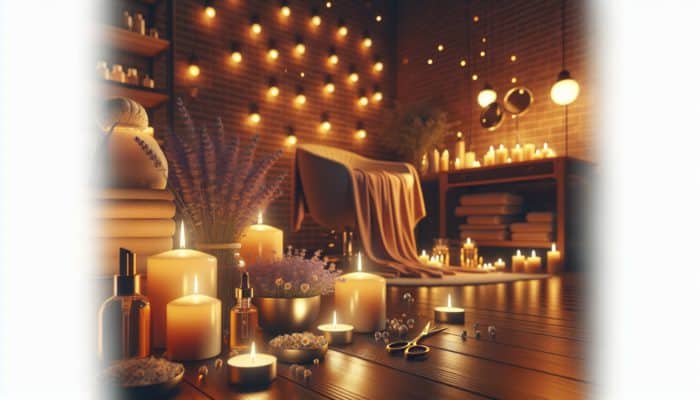
Before diving into the indulgent details of your hair spa journey, it is crucial to gather all necessary supplies to guarantee a seamless experience. Essential items include high-quality oils, hydrating hair masks, and various tools such as brushes and towels. Investing in natural ingredients can vastly enhance your hair care regimen; consider using organic coconut oil, argan oil, or shea butter masks specifically formulated to cater to your unique hair type.
As you compile your supplies, be sure to include practical accessories such as a shower cap, clips for sectioning your hair, and a wide-tooth comb for gentle detangling. Having everything within arm's reach will facilitate a fluid, uninterrupted process. This careful preparation lays the groundwork for a successful spa experience, ensuring you won’t have to search for items mid-treatment and allowing you to immerse yourself in the rejuvenating process fully.
Plan Your Time Effectively for a Relaxing Spa Experience
Time management is often underestimated, yet it is pivotal if you wish to enjoy the benefits of your at-home spa day fully. Designate a dedicated block of time, ideally two to three hours, allowing yourself to complete the entire treatment without feeling rushed. Remember, this is not merely a hair care routine; it is a self-care ritual designed to nurture both your hair and your spirit.
Begin by breaking down the various stages of the process, from cleansing to conditioning and styling. Setting timers or reminders for each stage, especially during deep conditioning or oil treatments, can help ensure that you achieve optimal results. By consciously dedicating this time to yourself, you can mentally prepare for the experience, enhancing not just the condition of your hair but also your overall sense of well-being and relaxation.
Select the Most Suitable Products for Your Hair Type
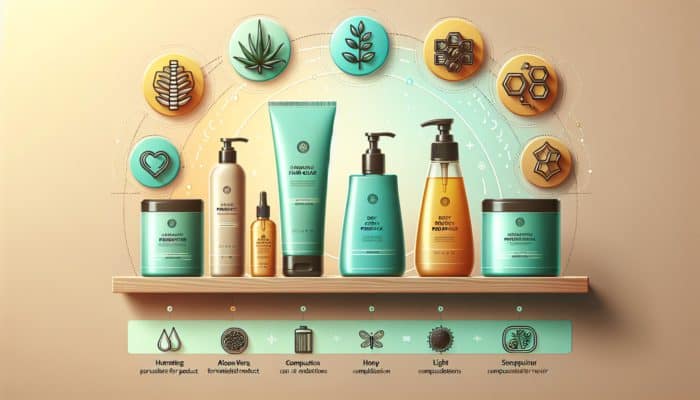
Choosing the right products tailored to your specific hair type is crucial for achieving the best results during your DIY spa. Hair types can vary dramatically, ranging from straight to curly, and from fine to coarse, and each requires a different formulation for optimal care. Conduct thorough research to determine which ingredients will best meet your hair’s unique needs.
For example, if you are dealing with dry, damaged hair, look for products that feature hydrating ingredients such as aloe vera, honey, or oils rich in fatty acids. Conversely, individuals with oily hair may prefer lighter formulations to avoid weighing their strands down. Consulting reviews and testimonials can also help guide your product choices, ensuring you make informed decisions that align with your hair goals. Such meticulous attention to detail transforms the DIY treatment from mere indulgence into a well-planned regimen that actively promotes hair health.
Set Up Your Workstation for a Smooth Spa Treatment
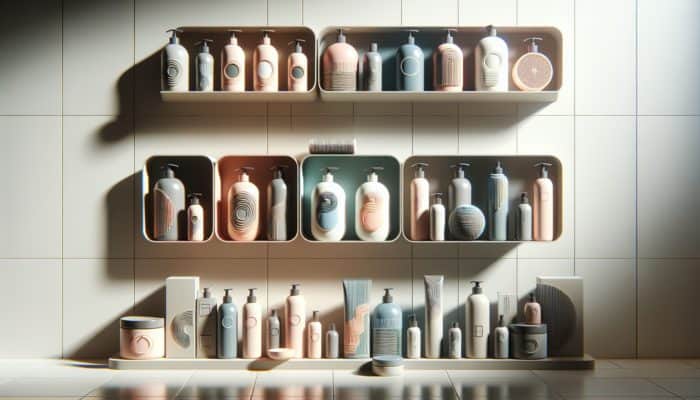
A well-organised workstation is vital for ensuring a smooth and enjoyable hair spa experience. Position all your selected products, tools, and equipment conveniently to minimise fuss during the treatment. Ensure the area is well-lit so you can see clearly what you are doing, especially when applying oils or masks.
Organise your products based on the order of application; for instance, place the shampoo and conditioner front and centre, followed by hair masks and oils. This methodical arrangement allows you to maintain focus and continuity throughout the treatment. Additionally, consider incorporating a small mirror if you are applying products yourself, as this can enhance your control and technique, contributing to an effective and enjoyable experience.
Commence Your Hair Spa with a Thorough Cleansing
Select a Shampoo Tailored to Your Hair Needs
The first step in your DIY hair spa at home journey is pivotal: cleansing your hair effectively. Choosing a shampoo that is specifically designed for your hair type can make a significant difference. For instance, if you have coloured hair, opt for a colour-safe shampoo that nourishes without stripping away the colour. In contrast, those with oily hair may benefit from clarifying shampoos that effectively remove excess oil and product build-up.
Consider the formulation as well; sulphate-free shampoos are often gentler on the hair, making them ideal for sensitive scalps and damaged strands. Take your time while applying the shampoo, ensuring it lathers thoroughly and reaches every part of your scalp. A thorough cleanse not only prepares your hair for subsequent treatments but also sets the stage for optimal absorption of the nourishing ingredients that follow.
Indulge in a Relaxing Scalp Massage
After applying your chosen shampoo, it is time to indulge in the therapeutic practice of a scalp massage. Massaging your scalp not only feels pleasurable, but it also significantly stimulates blood circulation, promoting healthier hair growth. Use your fingertips in gentle, circular motions, applying soft pressure while avoiding aggressive scratching that could irritate the skin.
This practice also helps to loosen any dirt or product build-up, ensuring a thorough cleanse. For added benefits, consider incorporating an essential oil blend during this massage; oils such as peppermint or rosemary can stimulate hair follicles while providing a soothing aroma. The combination of effective cleansing and a soothing scalp massage elevates the entire wash experience into a luxurious affair, enhancing your DIY spa journey.
Ensure a Thorough Rinse
Rinsing your hair thoroughly is a step that should never be overlooked. Neglecting to rinse out your shampoo adequately can lead to residue build-up, which may weigh your hair down and cause it to appear dull. Ensure that all shampoo is washed away, allowing the water to run clear before proceeding to the next stage of your hair spa.
As you rinse, pay attention to the temperature of the water. Using lukewarm water is advisable, as it opens up the hair cuticles, facilitating a deeper cleanse while preventing the stripping of natural oils. This balanced approach not only ensures that your hair feels fresher but also maintains its natural shine and vitality.
Utilise Lukewarm Water for Optimal Results
The temperature of the water used during your hair care routine can significantly impact the health and appearance of your locks. Lukewarm water strikes the perfect balance, opening up the hair cuticles for better cleansing and treatment absorption while preventing the loss of essential oils.
While hot water may feel comforting, it can inadvertently lead to dry, brittle hair by removing too much moisture. Conversely, cold water may not cleanse effectively, leaving residues behind. Achieving the right balance with lukewarm water during your cleansing phase ensures that your hair remains healthy, vibrant, and full of life.
Apply Conditioner for Enhanced Hydration
Following the cleansing step, the next vital procedure is to apply conditioner. Conditioner does not merely leave your hair feeling softer; it works on a deeper level to restore moisture lost during washing. For those looking to create a DIY hair spa at home, selecting the right conditioner is crucial. Opt for a product that complements your shampoo, focusing on hydrating properties if your hair is dry or strengthening ingredients if it is damaged.
Apply the conditioner evenly throughout your hair, concentrating on the ends where damage is most pronounced. Allow it to sit for a few minutes to enable the ingredients to penetrate effectively. This critical step not only enhances the cleanliness of your hair but also prepares it for deeper conditioning treatments that follow, ensuring your strands are primed for the best possible results.
Engage in Deep Conditioning for Maximum Benefits
Applying a Nourishing Hair Mask
Deep conditioning is a cornerstone of any effective hair spa, and applying a hair mask marks the beginning of the real transformation. The purpose of a hair mask is to provide intense moisture and repair for tired, damaged hair. For those eager to master a DIY hair spa at home, selecting the right mask is crucial. Look for masks enriched with natural oils, proteins, and vitamins tailored to your hair's specific needs.
To apply, begin on damp hair after rinsing out your conditioner. Section your hair into manageable parts to ensure even distribution of the mask from roots to tips. Using a wide-tooth comb can facilitate this process, ensuring that every strand is coated with the nourishing formula. Allow the mask to sit for the recommended duration, which can range from 15 minutes to an hour, depending on the product. This patience is rewarded with revitalised, silky strands that feel incredibly soft and healthy.
Wrap Your Hair for Enhanced Effectiveness
To maximise the efficacy of your hair mask, consider wrapping your hair in a warm towel. This simple yet effective technique enhances heat retention, allowing the mask to penetrate deeply into the hair shaft, providing a more thorough treatment. The warmth opens the cuticles further, enabling the active ingredients to work their magic effectively.
If you don’t have a warm towel available, using a shower cap is an excellent alternative to trap heat more effectively. This method allows you to relax while simultaneously indulging in a mini treatment for your hair. Whether you choose to binge-watch your favourite series or enjoy some quiet time, this step transforms your hair care routine into a pampering session that is both relaxing and effective.
Be Patient and Allow the Mask to Work
Patience is essential when it comes to deep conditioning. Allowing your hair mask to work for the recommended time—typically 20 to 30 minutes—can lead to substantial benefits. During this period, the mask's ingredients penetrate deeply, helping to repair damage and restore moisture levels.
Make the most of this time; consider immersing yourself in a good book or practising mindfulness to enhance your overall spa experience. This process is not solely about hair; it embodies a holistic approach to well-being. The longer you allow the mask to work, the more pronounced the results will be. This simple act of self-care can yield transformative effects, leaving your hair feeling revitalised and full of life.
Rinse Out Thoroughly After Deep Conditioning
Once the designated time has elapsed, it is crucial to rinse your hair thoroughly to remove the mask. Use lukewarm water to ensure that all residues are washed away while sealing in moisture. It is essential to take your time during this step, as any remaining product can weigh down your locks and diminish their shine.
As you rinse, consider employing a gentle upward motion to stimulate the scalp. This not only aids in removing the mask but also promotes healthy blood circulation. Following up with a cool rinse at the end can help close the hair cuticles, sealing in all the nourishing ingredients and leaving your hair looking glossy and vibrant.
Incorporate Oil Treatments for Luxurious Hair
Select the Ideal Oil for Your Hair
Integrating an oil treatment into your DIY hair spa is an essential step for achieving luscious, healthy hair. When considering a DIY hair spa at home, it is crucial to select an oil tailored to your specific hair needs. Oils such as coconut, argan, or jojoba possess unique properties that can address a variety of hair concerns.
For instance, coconut oil is renowned for its deep-penetrating abilities, which can help reduce protein loss in hair, making it ideal for damaged or dry strands. Argan oil, rich in antioxidants, is excellent for adding shine and reducing frizz, while jojoba oil mimics the scalp's natural oils, making it perfect for oily hair types. Carefully evaluate your hair’s condition and choose an oil accordingly to provide the most benefits during your treatment.
Warm the Oil for Enhanced Absorption
Warming your chosen oil can significantly enhance its effectiveness during the treatment. Gently heat the oil until it is warm but not hot; this precaution is essential to prevent any potential burns. Warm oil not only feels soothing on the scalp but also promotes better absorption, allowing the nourishing properties to penetrate more deeply into the hair follicles.
You can use a microwave for convenience, or place the oil in a bowl and submerge it in hot water. Once the oil is warmed, use your fingertips to apply it directly to your scalp, followed by the lengths of your hair. This warming step elevates the oil from a simple treatment to a luxurious pampering experience, ensuring your hair receives maximum hydration and nourishment.
Achieve Even Distribution of the Oil
Distributing the oil evenly is key to ensuring that every strand benefits from its properties. Begin at the roots, using your fingertips to massage the oil into the scalp, promoting blood circulation and stimulating hair growth. Work your way down to the tips, ensuring you cover every section of your hair.
Using a wide-tooth comb can further help evenly distribute the oil throughout your hair. This method not only helps prevent tangles but also ensures that the oil is adequately absorbed. After application, you may choose to leave it on for a couple of hours or even overnight for a more intensive treatment.
Maximise Benefits with Steaming Techniques
Utilise a Steamer for Enhanced Treatment
Incorporating steam into your hair care routine can elevate your DIY spa experience and enhance the effectiveness of your treatments. Hair steaming opens up the cuticles, allowing for deeper penetration of moisture and nutrients from the products you’ve applied. If you're exploring how to do a DIY hair spa at home, using a hair steamer can truly revolutionise the process.
If you don’t own a professional steamer, you can create steam at home using a bowl of hot water. Lean over the bowl, covering your head with a towel to trap the steam and envelop your hair in its warmth. Just ensure to maintain a safe distance to avoid burns. The infusion of steam hydrates the hair, making it more receptive to oils and masks, resulting in soft, shiny strands.
Cover Your Hair with a Cap Post-Steam
After steaming, it is beneficial to cover your hair with a plastic cap. This helps to trap heat and moisture, further enhancing the absorption of the products you’ve applied. The heat encourages the cuticles to stay open, allowing the nourishing ingredients to penetrate deeply.
You can leave the cap on for 30 minutes to an hour, depending on the products you are using. This additional heat retention ensures that your hair receives maximum benefits from the treatment. As you relax during this time, consider using it as an opportunity for self-care, engaging in activities that bring you joy, such as reading, meditating, or simply enjoying peaceful moments.
Take Time to Unwind and Relax
While the steam and heat work their magic, take this opportunity to unwind and relax. Create a serene atmosphere by engaging in calming activities that enhance your overall experience. Whether you choose to meditate, listen to soothing music, or sip herbal tea, this downtime is essential for both your hair and your mind.
Engaging in relaxation techniques not only amplifies the benefits of your hair spa treatment but also promotes overall well-being. This holistic approach to self-care can lead to increased satisfaction and a sense of accomplishment as you complete each step of your DIY hair spa.
Rinse and Refresh Your Hair
Finish with a Cool Water Rinse
When the time comes to rinse out all oils and treatments, using cool water is a vital step that is often overlooked. Cool water serves to close the hair cuticles, locking in moisture and shine while minimising frizz. This final rinse can make a significant difference in how your hair feels and looks post-treatment.
Begin by rinsing with lukewarm water to remove the bulk of the products, then switch to cool water for the final rinse. This technique not only seals in the benefits of your treatment but also imparts a glossy finish to your hair. The refreshing sensation of cool water can also be invigorating, leaving you feeling revitalised and ready to style your hair.
Avoid Harsh Products Post-Treatment
After your spa experience, it is essential to be mindful of the products you apply to your hair. Steer clear of harsh shampoos or styling products laden with sulfates and parabens, as these can strip away the benefits of your recent treatment. Instead, opt for gentle, natural products that maintain your hair’s health and vibrancy.
Look for shampoos and conditioners that are free from damaging chemicals, focusing on nourishing ingredients that will continue the work of your DIY spa. This attention to post-treatment care ensures that you maintain the results and keep your hair looking its best for an extended period.
Gently Pat Dry to Preserve Hair Health
When drying your hair, it is crucial to handle it with care. Instead of rubbing your hair vigorously with a towel, which can lead to breakage and frizz, pat your hair dry. Use a soft, absorbent towel or a cotton T-shirt to remove excess moisture gently. A delicate approach helps to preserve the integrity of your hair while ensuring it retains its natural shine and softness. Furthermore, avoid using heated styling tools immediately after washing; allowing your hair to air dry can maintain the benefits of your treatment, ensuring it stays healthy and nourished.
Style Your Hair with Care
Utilise a Wide-Tooth Comb for Gentle Detangling
When it comes to styling after your DIY hair spa, a wide-tooth comb is your best ally. Using a wide-tooth comb helps to detangle hair effectively without causing unnecessary breakage, which is especially important after a hydrating treatment. Begin from the tips and gently work your way up to the roots, minimising tension on your strands.
This method is particularly beneficial for those with curly or textured hair, as it helps maintain the natural curl pattern while reducing frizz. The gentle detangling process prepares your hair for styling, enabling you to create beautiful looks without compromising your hair's health.
Incorporate Leave-In Conditioner for Ongoing Moisture
After detangling, applying a leave-in conditioner can significantly enhance your hair care routine. Leave-in products provide continuous moisture and protection throughout the day, ensuring your hair remains hydrated and manageable. For those navigating how to do a DIY hair spa at home, this step can greatly enhance the longevity of your treatment.
Select a lightweight leave-in conditioner that suits your hair type, and apply it evenly throughout your hair. This product can also serve as a barrier against environmental stressors, providing your hair with the extra care it needs to stay healthy and vibrant.
Style Your Hair to Showcase Your Revitalised Locks
Finally, style your hair as desired, while keeping in mind the principles of heat protection and minimal manipulation. If you choose to heat style, ensure that you use a thermal protectant to prevent damage. Embrace a variety of styles that complement your refreshed, revitalised hair, whether it’s sleek and straight, soft waves, or natural curls.
The beauty of a DIY hair spa is that not only do you enjoy healthier hair, but you also have the opportunity to express yourself through styling. Experiment with different looks, and remember that the key to stunning hair lies not only in the treatment but also in how you choose to style and maintain it moving forward.
Commit to Maintaining Your Hair’s Health
Incorporate Regular Treatments into Your Routine
To sustain the health and appearance of your hair, consider integrating regular DIY hair spa treatments into your beauty routine. While a single treatment can yield beautiful results, consistency is crucial to maintaining your hair's nourishment and vibrancy. Aim for a deep conditioning treatment every two weeks to keep your hair in optimal condition.
Experiment with various oils, masks, and techniques to discover what works best for your hair type. The more familiar you become with your hair’s needs, the more effective your treatments will be. Over time, you’ll notice a significant improvement in your hair’s texture, shine, and overall health, making regular treatments an indispensable part of your self-care regimen.
Adopt Healthy Lifestyle Choices for Better Hair
Beyond at-home treatments, adopting healthy lifestyle choices can have a profound impact on your hair’s condition. Staying hydrated, maintaining a balanced diet, and engaging in regular exercise contribute to improved hair health. Drinking enough water helps keep your body and hair hydrated, while a diet rich in vitamins and minerals supports healthy hair growth and strength.
Incorporate foods rich in Omega-3 fatty acids, such as salmon and walnuts, along with leafy greens and fruits high in antioxidants, into your meals. These choices not only benefit your hair but also enhance your overall well-being. By combining external treatments with internal health, you create a holistic approach to hair care that yields long-lasting results.
Shield Your Hair from Environmental Damage
Protecting your hair from environmental stressors is also crucial in maintaining its health. UV rays, pollution, and harsh weather conditions can all take a toll on your strands. When spending time outdoors, consider wearing a hat or using hair products with UV protection to shield your hair from damage.
Additionally, limit the use of heat styling tools and always apply heat protectant sprays when you do. This protective approach ensures that your hair remains resilient and is less prone to breakage, allowing you to enjoy the benefits of your hair spa treatments for an extended period.
Schedule Regular Trims for Healthy Hair
Lastly, scheduling regular trims is a fundamental practice for maintaining healthy hair. While trimming may seem counterintuitive if you're attempting to grow your hair, removing split ends helps prevent further damage and breakage. Aim for a trim every six to eight weeks to keep your hair looking fresh and healthy.
This simple practice complements your DIY spa efforts, ensuring that you maintain not just the length but also the vitality of your hair. By adopting regular hair care habits, you set the stage for beautiful, healthy locks that turn heads and inspire confidence.
Frequently Asked Questions
How often should I treat myself to a DIY home hair spa?
Aim for a DIY hair spa session every other week to maintain optimal hair health. This frequency allows for deep conditioning while preventing product overload.
What products are best for my hair spa treatment?
Utilise high-quality shampoos, conditioners, and hair masks tailored to your hair type. Natural oils, such as coconut or argan oil, can also enhance your treatment.
Can I use regular kitchen oils for my hair spa?
Oils like olive oil, coconut oil, and avocado oil can be beneficial. They provide nourishment and hydration for your hair.
Is steaming a necessary part of a hair spa?
While not mandatory, steaming enhances product absorption and helps open hair cuticles for deeper penetration of nutrients.
What should I do after completing my hair spa treatment?
After your treatment, rinse with cool water. Avoid using harsh products and consider using a leave-in conditioner for ongoing hydration.
What if my hair is oily?
If you have oily hair, opt for light, non-greasy products. Deep conditioning remains essential, but consider using clarifying shampoos instead.
How can I tell if my hair needs a spa treatment?
Signs include dryness, frizz, dullness, or breakage. If your hair fails to bounce back after styling, it likely requires a nourishing treatment.
Is it safe to perform a DIY hair spa on colour-treated hair?
Certainly! Just choose products specifically formulated for colour-treated hair to maintain vibrancy while providing moisture.
How can I create a homemade natural hair mask?
Combine ingredients such as honey, yoghurt, and olive oil for a nourishing mask. Adjust proportions based on your hair length and type.
Is it safe to leave oil in my hair overnight?
Yes, leaving oil in overnight allows for deeper penetration. Just ensure to cover your hair to avoid staining pillowcases.
Comments are closed