Mastering the Art of Micro Braids: A Comprehensive Guide
What Exactly Are Micro Braids?
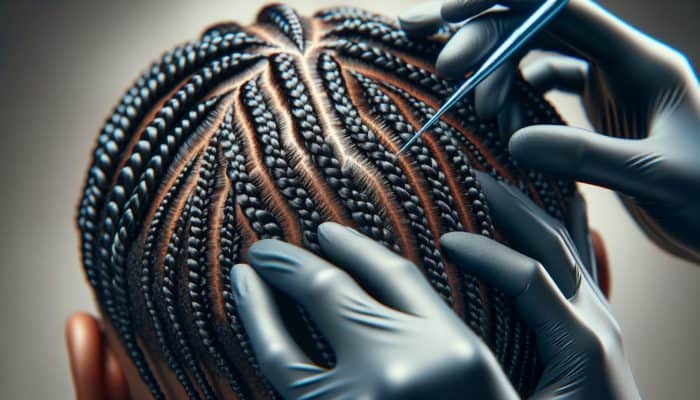
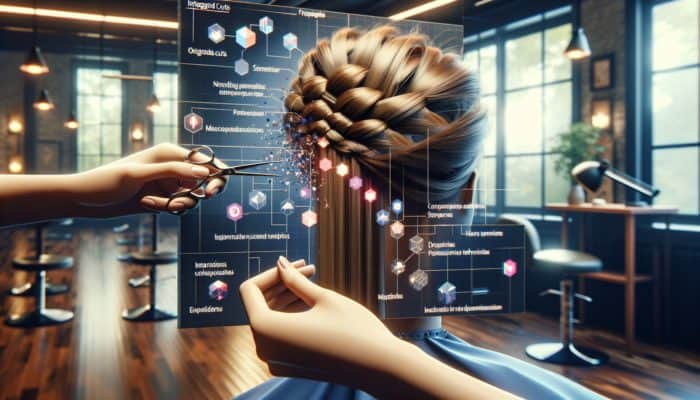
Creating Micro Braids with Integrated Cuts: Micro braids are exceptionally small, individual braids that create a visually stunning and highly adaptable hairstyle. Their intricate design allows for a variety of styling options, making them suitable for diverse hair types, including straight, wavy, and curly textures. These tiny braids can be fashioned into numerous styles, ranging from sophisticated updos to casual, flowing locks. Beyond their aesthetic appeal, micro braids also serve as a protective hairstyle, promoting the overall health and integrity of your hair. Here’s a diverse selection of micro braid styles you may want to explore:
- Classic Micro Braids
- Cornrow Micro Braids
- Twisted Micro Braids
- Braided Ponytail with Micro Braids
- Micro Braids with Ombre Colouring
- Beaded Micro Braids
- Half-Up Micro Braid Styles
- Micro Braids with Decorative Hair Accessories
These styles exemplify the versatility of micro braids, catering to individual tastes and specific occasions. Their charm is rooted in their ability to enhance any outfit or event, adding an elegant touch. The fine size of micro braids creates a captivating visual texture that attracts attention while allowing for personal expression.
Essential Tools and Materials for Micro Braiding
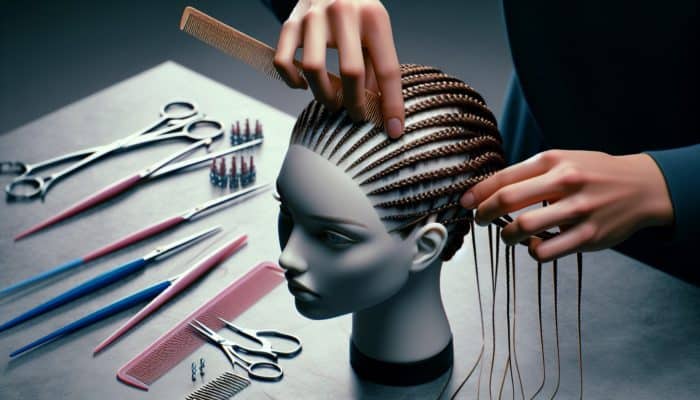
To create stunning micro braids, specific tools and materials are essential to ensure an efficient process and a polished result. Key items include a rat-tail comb for precise sectioning, hair clips to secure segments in place, and styling products to maintain the appearance of the braids. Below is a curated list of recommended products to facilitate the creation of micro braids:
- Rat-Tail Comb
- Hair Clips
- Sulfate-Free Shampoo
- Moisturising Conditioner
- Lightweight Styling Gel or Mousse
- Anti-Frizz Serum
- Silk Scarf or Bonnet
- Hair Extensions (for added length or volume)
Having the right tools and materials is crucial for achieving the desired outcome. Each product serves a specific purpose, from detangling and sectioning to securing and styling. Investing in quality products will also benefit the health of your hair throughout the process, ensuring it remains strong and vibrant.
How to Prepare Your Hair for Braiding
Proper hair preparation is essential for flawless micro braids. The preparation process involves thorough washing, conditioning, and detangling to ensure your hair is in optimal condition for styling. Begin with a gentle, sulphate-free shampoo to cleanse the scalp and eliminate any buildup, followed by a deep conditioner to hydrate and soften the strands. This step is vital as it reduces the risk of breakage and tangles during the braiding process.
After washing, carefully detangle your hair using a wide-tooth comb or your fingers to avoid pulling or damaging the strands. Once detangled, allow your hair to air dry partially or use a blow dryer on a low heat setting. Applying a lightweight leave-in conditioner or moisture-rich cream can further enhance your hair's health and prepare it for braiding. Ensuring your hair is clean, well-conditioned, and thoroughly detangled will significantly improve the results of your micro braids, resulting in a smoother, more polished finish.
Professional Insights on Crafting Micro Braids with Integrated Cuts
What Techniques Do Experts Employ?
Professionals in the hairstyling industry utilise various techniques to create micro braids with integrated cuts that appear seamless and stylish. One widely-used method is “feed-in braiding,” where additional hair is gradually incorporated into the braid as it progresses. This technique enables greater control over the thickness of the braids and ensures a natural appearance, particularly when incorporating cuts.
Another effective approach is to maintain consistent tension throughout the braiding process. This is achieved by holding the hair steadily while braiding, preventing any unevenness or bumps. Experts recommend using a mirror to check the symmetry of the braids as you work, making it easier to identify areas that may require adjustments. Real-world examples include professional stylists who have perfected the art of blending cuts into micro braids, often showcasing their work on social media platforms to inspire others.
Additionally, many experts recommend sectioning the hair into small, manageable parts before beginning the braiding process. This practice helps maintain control and precision, ensuring each braid is uniform in size and appearance. By employing these techniques, you can achieve a polished look that highlights the beauty of both the micro braids and the integrated cuts.
How Can You Maintain Integrated Cuts Effectively?
Maintaining the integrity of cuts within micro braids necessitates regular attention and proper care to prevent frizz and breakage. To start, it's vital to keep the scalp moisturised and the braids looking fresh. Applying a lightweight oil or moisturising spray to the scalp can help alleviate dryness and irritation, promoting a healthy environment for hair growth.
Regularly checking the condition of your braids is also crucial. If you notice any fraying or unevenness, take the time to adjust or re-braid those sections to maintain uniformity carefully. Using an anti-frizz serum can create a sleek appearance and reduce the likelihood of stray hairs appearing around the braids.
Moreover, it’s essential to avoid excessive manipulation of the braids. This means refraining from constantly touching or adjusting them, as this can lead to unnecessary wear and tear. Instead, establish a simple routine that includes gentle cleansing with a sulphate-free shampoo and reapplying your favourite styling product every few days. By following these actionable steps, you’ll ensure your micro braids with integrated cuts remain looking fresh and vibrant for weeks.
What Common Challenges Do Experts Encounter?
Even seasoned braiders face challenges when integrating cuts into micro braids. One common issue is achieving even sections, which can lead to inconsistencies in the overall appearance of the braids. To overcome this, experts recommend taking the time to section the hair meticulously before beginning the braiding process. Using a rat-tail comb to create neat, straight lines can significantly enhance the outcome.
Another challenge is maintaining proper tension during braiding. If the tension is too loose, the braids may unravel or appear messy, while excessive tension can lead to breakage and scalp discomfort. Experts suggest practising on a mannequin head or a friend's hair to hone your skills in maintaining the right balance. Additionally, be mindful of the cutting technique used when integrating cuts; making small, precise snips will yield better results than larger, haphazard cuts.
Finally, ensuring that the braids sit close to the scalp while remaining comfortable can be tricky. Striking the right balance requires practice and patience, but focusing on the techniques mentioned can make the process smoother. By effectively addressing these common challenges, you can elevate your braiding skills and create stunning micro braids that reflect your artistic vision.
Step-by-Step Approach to Creating Micro Braids
How to Section Your Hair Correctly
Proper sectioning is crucial for achieving uniform micro braids. Begin by ensuring your hair is completely dry and free of tangles. Using your rat-tail comb, divide your hair into small, manageable sections. This may involve parting your hair down the centre or creating smaller horizontal or vertical sections, depending on your preference.
Each section should be no wider than a finger's width to ensure the braids are genuinely micro in size. Once you’ve created the sections, use hair clips to secure them in place, preventing any stray hairs from interfering with the braiding process. This meticulous organisation makes it easier to focus on each braid, allowing for a neater and more professional appearance.
After sectioning, it can be beneficial to apply a small amount of styling product or moisturiser to each section. This not only helps maintain the braid's hold but also adds shine and reduces frizz. Ensuring that each section is well-prepared before you start braiding will ultimately lead to a more polished final look.
What Steps to Follow to Start Braiding?
Initiating the braiding process involves a few simple steps. First, take a small section of hair from one of your prepped sections and divide it into three equal parts. To begin the braid, cross the right section over the middle section, followed by the left section over the new middle section. This basic technique, known as the three-strand braid, serves as the foundation for creating micro braids.
As you continue braiding, ensure you maintain an even tension throughout. This is crucial for ensuring the braids sit flat against the scalp while also retaining their structure. If you notice any areas of uneven tension, gently adjust them as you progress.
For integrated cuts, once you've braided down to the desired length, carefully snip small sections of the braid at your preferred lengths. Ensure that the cuts are symmetrical and consistent for a balanced appearance. Mastering this technique takes practice, but with time, you'll be able to create beautiful micro braids that incorporate seamless cuts.
Integrating Cuts Into Your Braids: A Guide
Integrating cuts into your micro braids requires a combination of precision and creativity. To start, braid your hair as you normally would, maintaining a consistent pattern throughout. When you reach the desired length of the braid, it's time to integrate the cuts.
Using sharp hair scissors, carefully snip small sections at a time, ensuring that each cut is made with precision and intention. This technique will create a layered effect within the braids, adding depth and dimension. It's essential to keep the cuts symmetrical to maintain a professional appearance.
You may opt to integrate cuts at varying lengths to create a more dynamic look. Experiment with different lengths to see how they affect the overall visual appeal of your hairstyle. Regularly check your progress in a mirror; this will help you ensure that the integrated cuts complement each other and enhance the overall braid design. By thoughtfully integrating cuts, you can transform standard micro braids into an artistic expression that showcases your unique style.
Exploring Styling and Customisation Options for Your Micro Braids
What Are the Most Popular Styling Options for Micro Braids?
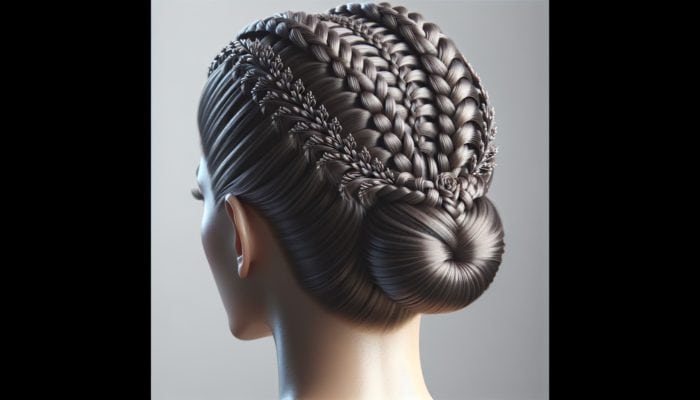
Micro braids provide a myriad of styling options, offering ample opportunity for creativity and personal expression. One popular choice is the classic updo, where the micro braids are twisted and pinned into a chic hairstyle, making it ideal for formal occasions. This style not only looks elegant but also keeps the hair neatly secured away from the face.
Another trendy option is to leave the micro braids down, allowing them to cascade over the shoulders for a relaxed look. You can enhance this style by adding waves or curls to the ends for added texture and movement. For a more playful appearance, consider styling the micro braids into high pigtails or space buns, which create a fun and youthful vibe.
Moreover, accessorising your micro braids can significantly elevate your style. Adding beads, charms, or colourful ribbons can personalise your look and highlight the intricate detailing of the braids. These accents can be easily changed, allowing for versatility without the need for re-braiding.
Utilising hair ties that complement your hairstyle or incorporating metallic clips can enhance the overall aesthetic. The styling possibilities are virtually endless with micro braids, enabling you to tailor your look to suit any occasion or mood.
How to Add Accessories to Enhance Your Braids?
Incorporating accessories into your micro braids is an excellent way to enhance their visual appeal and showcase your personal style. One popular method is to use beads, available in various shapes, sizes, and colours. By threading beads onto the ends of your micro braids, you can create a stunning focal point that captures attention.
You might also consider adding charms or decorative clips along the braids to introduce elements of interest. For instance, metallic clips can add a touch of elegance, while colourful ribbons provide a fun, playful vibe. When adding accessories, it's crucial to maintain the overall balance of the hairstyle; excessive accessories can overwhelm the look.
Another option is to experiment with hair cuffs, which can be placed at different points along the braid to create an edgy, bohemian style. These elements not only enhance the aesthetic but also allow for easy changes without the need to redo the braids. The right accessories can elevate your micro braids from simple to extraordinary, making them a standout feature of your look.
What Are the Best Ways to Customise Your Braids?
Customising micro braids enables you to express your individuality and create a hairstyle that reflects your personal style. One of the simplest ways to customise your braids is by experimenting with different lengths. You can create a layered effect by varying the lengths of individual braids or integrating cuts throughout.
In addition to length, playing with different patterns can also make your micro braids unique. Consider incorporating twists or spiral braids into the mix for added texture and interest. You can also choose to mix various braiding techniques, such as combining traditional braids with micro braids or adding cornrows for a striking contrast.
Colour can significantly impact the overall appearance of micro braids. Whether you opt for bold hues or subtle highlights, adding colour can add depth and dimension to your hairstyle. Temporary hair dyes or coloured hair extensions can be used to achieve this effect without long-term commitment.
Lastly, don’t hesitate to let your personality shine through by using unique hair accessories or patterns. Every choice you make in customising your micro braids contributes to the overall look, allowing you to create a style that is distinctly yours.
Reliable Strategies for Crafting Micro Braids with Integrated Cuts
What Are the Best Practices for Beginners?
For beginners venturing into the world of micro braids, starting with smaller sections is crucial. This approach enables greater control over the braiding process, resulting in more uniform outcomes. Patience is key; take your time to ensure each braid is completed properly without rushing.
Moreover, it's advisable to practice on a friend or a mannequin head before attempting to style your own hair. This provides the opportunity to refine your technique and gain confidence in your braiding skills. Additionally, consider watching tutorials or seeking guidance from experienced braiders to understand the nuances of integrating cuts successfully.
Utilising the right tools is another best practice for beginners. Quality rat-tail combs, clips, and styling products will streamline the process and enhance your experience. Always remember to maintain proper tension while braiding, as this is essential for achieving a neat and polished look. By following these foundational steps, beginners can build a strong foundation for mastering micro braids with integrated cuts.
How to Achieve Professional-Looking Results?
Achieving professional results with micro braids and integrated cuts requires meticulous attention to detail and a steady hand. Begin by setting up a well-lit workspace; good lighting helps you see what you’re doing and ensures that you can catch any inconsistencies early on.
Practising proper sectioning techniques is vital; this ensures that each braid is uniform and sits well against the scalp. Additionally, maintaining consistent tension throughout the braiding process prevents unevenness or looseness in the braids, resulting in a more professional finish.
Having a keen eye for symmetry is also essential. Regularly checking your progress in a mirror will help you identify any imbalances as you work. Furthermore, using high-quality hair products is essential for maintaining the integrity of both micro braids and integrated cuts. This approach will not only enhance the appearance of your braids but also promote the overall health of your hair.
Lastly, don’t hesitate to take breaks when needed. A steady hand and a relaxed mindset will significantly contribute to achieving the professional results you desire. By adhering to these expert strategies, you can elevate your braiding skills to create stunning micro braids with integrated cuts.
What Are the Key Elements of Successful Braiding?
Successful braiding hinges on several key elements that contribute to a polished and professional appearance. Here’s a list of essential components to ensure your micro braids turn out beautifully:
- Consistent Tension: Maintain even tension throughout to prevent uneven braids.
- Quality Tools: Use a rat-tail comb, clips, and sharp scissors for precision.
- Understanding Hair Texture: Tailor your techniques to suit your hair type for optimal results.
- Proper Sectioning: Divide hair into small, manageable sections for uniform braids.
- Attention to Detail: Regularly check for symmetry and make adjustments as necessary.
- Patience: Take your time to ensure each braid is well-executed.
- Moisturising Products: Use products that promote hydration and prevent frizz.
- Regular Practice: Hone your skills over time to achieve better results.
Integrating these elements into your braiding routine will significantly enhance the quality of your micro braids, leading to a more satisfying and visually appealing hairstyle. Emphasising these key aspects will allow you to tackle more complex styles and techniques with confidence.
How Can You Maintain Micro Braids with Integrated Cuts?
To effectively maintain micro braids with integrated cuts, regular moisturising is vital. Keeping the scalp and braids hydrated will help prevent dryness and breakage. Light oils or leave-in conditioners can be applied to maintain moisture levels and enhance the overall shine of the braids.
Careful handling is equally important in preserving the integrity of the style. Avoid excessive manipulation and refrain from pulling or tugging on the braids, as this can lead to damage. Instead, incorporate a gentle daily care routine that involves lightly massaging the scalp and applying a moisturiser as needed.
Consider using a silk scarf or bonnet while sleeping to protect your braids from friction and damage. This can help reduce frizz and maintain the style's longevity. Finally, be mindful of the duration you keep your micro braids in; generally, it’s advisable to remove them after 6-8 weeks to prevent hair damage and allow your scalp to breathe.
Implementing these tips will not only help maintain the appearance of your micro braids but also promote the health of your hair throughout the styling process.
Comprehensive Care and Maintenance for Your Micro Braids
Daily Care Routine for Micro Braids: Best Practices
Maintaining micro braids necessitates a consistent daily care routine to ensure they remain fresh and healthy. Begin each day by gently massaging your scalp with your fingertips to stimulate blood circulation. This simple act can promote hair growth and alleviate tension around the braids' roots.
Moisturising the scalp is also crucial. Using a lightweight oil or a hydrating scalp treatment is recommended. Applying a small amount directly to the scalp can combat dryness and itchiness while ensuring that the braids maintain their overall appearance.
At night, protecting your micro braids is essential. Wearing a silk scarf or bonnet while sleeping can help reduce friction against your pillow, which can cause frizz and looseness in your braids. Additionally, this protective measure will allow your braids to maintain their shape and shine, enhancing their longevity.
Establishing a daily care routine will not only improve the aesthetics of your micro braids but also promote scalp health and hair growth over time.
How to Refresh Your Braids Effectively
Refreshing micro braids is a vital aspect of maintaining their appearance and ensuring they look vibrant throughout their wear. Start by gently washing the braids with a sulphate-free shampoo. This type of shampoo is less harsh and won’t strip the hair of its natural oils.
After washing, it’s crucial to apply a moisturising product to restore hydration. A lightweight leave-in conditioner can be particularly effective. Spray or apply the product evenly throughout the braids to help maintain their shape and reduce frizz.
If you notice any flat or lifeless braids, consider redoing the edges or the first few inches of the braid to give it a fresh look. This technique can revive your hairstyle without the need to redo the entire set of braids.
Lastly, ensure you continue to moisturise the scalp during this refresh process. Keeping the scalp hydrated is crucial for maintaining both the health of your hair and the appearance of your micro braids.
When Is the Right Time to Remove Your Braids?
Recognising when to remove your micro braids is essential for preventing damage to your hair and maintaining scalp health. Generally, it’s advisable to consider removing your braids after 6-8 weeks of wear. However, individual hair growth rates and the condition of your braids can influence this timeframe.
Here are some signs that it may be time to remove your micro braids:
- Visible frizz or fuzz around the braids.
- Scalp irritation or discomfort.
- Loose braids that are no longer secure.
- Signs of breakage or damage in the natural hair.
- Unruly tangles that are difficult to detangle.
- Excessive itching or irritation on the scalp.
- Changes in hair texture that indicate the need for a reset.
- Desire for a new style or change in appearance.
Taking these signs seriously will help you maintain the health of your hair while giving you the freedom to explore new styles. Removing your micro braids promptly is an essential part of hair care that should not be overlooked.
Tips for Minimising Frizz and Flyaways
To keep micro braids smooth and frizz-free, several effective strategies can be implemented. First, using an anti-frizz serum or a lightweight oil can significantly help tame flyaways. Apply the product sparingly to avoid weighing the braids down and making them look greasy.
Another tip is to avoid excessive manipulation of the braids. Instead of continually adjusting or running your fingers through them, establish a hands-off approach to maintaining the style. This not only reduces the risk of frizz but also helps your braids maintain their neat appearance.
Regularly tucking in any loose hairs can also keep the style looking tidy. If you notice any strands peeking out, use a small amount of styling gel to secure them back into place. This simple step can make a substantial difference in the overall look of your micro braids.
Finally, when heading to bed, ensure you wear a silk scarf or bonnet to protect your braids from friction while sleeping. This will help preserve your style overnight and keep your micro braids looking sleek and polished.
Troubleshooting Common Issues with Micro Braids
How to Manage Frizz and Flyaways?
Frizz and flyaways can be common issues that arise with micro braids. To manage these, start by using a small amount of oil or anti-frizz serum to smooth down any unruly strands. Apply the product gently to the affected areas, ensuring you do not overapply it to the braids.
Additionally, maintaining a regular moisturising routine is key. By keeping your scalp and braids hydrated, you can reduce the likelihood of frizz developing. Consider using a light leave-in conditioner or a hydrating spray to keep the braids looking fresh and well-maintained.
If you find that frizz persists, try avoiding products that contain alcohol, as they can dry out the hair and contribute to frizz. Instead, opt for hydrating and nourishing products that promote shine and softness. By following these tips, you'll be able to effectively manage frizz and maintain the polished look of your micro braids.
What Are Your Options for Fixing Uneven Braids?
Fixing uneven braids is essential for achieving a polished and professional appearance. If you notice that some braids appear thicker or thinner than others, take a deep breath and focus on the specific sections that are affected. Start by carefully undoing the uneven braid; this will allow you to re-braid it with a more consistent size.
When re-braiding, pay close attention to the sectioning. Divide the hair into equal parts, ensuring that each is of similar width. This will help maintain uniformity throughout the braid. As you braid, maintain an even tension to avoid creating bumps or inconsistencies.
If you’re working with an established set of braids, you can also opt to adjust sections instead of undoing them entirely. For instance, pulling tighter on the thinner sections while loosening the thicker sections can create a more balanced appearance without requiring a complete redo of the work. This approach saves time and allows you to achieve a more uniform look across your micro braids.
How to Address Scalp Irritation Effectively?
Scalp irritation can be uncomfortable and detract from the beauty of your micro braids. To alleviate discomfort, start by regularly cleansing your scalp. Use a gentle, sulphate-free shampoo to remove any buildup and prevent irritation.
Incorporating a soothing oil, such as tea tree or jojoba oil, into your scalp care routine can also help reduce inflammation and promote healing. Apply the oil directly to the irritated area and gently massage it in to encourage relaxation and comfort.
Moreover, consider reducing the tightness of your braids during installation. If you frequently experience irritation, it may be worth re-evaluating your braiding technique to ensure you are not pulling too tightly. Furthermore, wearing your braids for shorter durations can also help mitigate irritation and give your scalp a chance to recuperate.
By addressing scalp irritation promptly and implementing these strategies, you can maintain the health and comfort of your scalp while enjoying your micro braids.
What Are the Best Practices for Preventing and Fixing Loose Braids?
Loose braids can be frustrating, but there are ways to prevent and fix this issue. To prevent loose braids, ensure that you maintain consistent tension throughout the braiding process. A tight grip at the roots will help prevent the braids from loosening over time.
If you’re dealing with already loose braids, the first step is to identify the affected sections. Gently pull on the loose braid to ascertain where it is coming undone. Once identified, you can carefully re-braid the loose sections, ensuring to maintain steady tension as you work.
Another strategy is to use small, clear hair elastics to secure the ends of the braids. This can help reinforce the braid's hold and prevent it from unravelling further. Ensure that when using elastics, they are not too tight, as this can lead to breakage.
Finally, regularly checking your braids for looseness and addressing any issues promptly will help maintain their integrity and overall appearance, ensuring your micro braids remain stunning throughout their wear.
How to Manage Braid Itchiness?
Braid itchiness can be an uncomfortable side effect of wearing micro braids, but there are effective ways to manage it. Begin by ensuring your scalp is clean and free from buildup, as this can exacerbate itching. A gentle shampoo specifically designed for braided hair can help keep your scalp fresh and irritation-free.
In addition, incorporating an anti-itch scalp treatment can provide immediate relief. Look for products containing soothing ingredients like aloe vera or tea tree oil, which are known for their calming properties. Apply these treatments directly to the itchy areas for quick relief.
Avoid scratching your scalp, as this can lead to irritation and potential damage. Instead, implement gentle massaging techniques using your fingertips to alleviate discomfort without causing harm.
Lastly, consider wearing your braids in a looser style if itchiness persists. This will allow your scalp to breathe and reduce irritation. By following these steps, you can effectively manage braid itchiness and enjoy your micro braids with comfort.
Advanced Techniques for Creating Micro Braids with Integrated Cuts
How to Create Intricate Patterns with Your Micro Braids?
Creating intricate patterns with micro braids is an advanced technique that can elevate your hairstyle to new heights. To achieve this, begin by planning your design before you start braiding. Drawing out or visualising the desired pattern will help you maintain focus as you work.
One effective method is to vary the size and direction of your braids. For example, incorporating larger braids alongside smaller ones can create an eye-catching contrast. Additionally, alternating the direction in which you braid—going clockwise in some areas and counterclockwise in others—adds a unique twist to your style.
Consider also integrating twists or cornrows into your micro braid patterns. This not only adds texture but can also create a visually striking effect. When working with intricate patterns, take your time, as precision is key to achieving a polished look.
Lastly, don’t hesitate to experiment with colour and accessories within your patterns. Adding beads or contrasting hair extensions can further enhance the intricacy of your design, making your micro braids truly one-of-a-kind.
How to Incorporate Multiple Textures into Your Braids?
Incorporating multiple textures into your micro braids can create a stunning and dynamic hairstyle. To achieve this, start by selecting hair extensions that feature varying textures. For instance, you might choose straight, wavy, and curly extensions to blend for a visually striking effect.
Begin the braiding process with the texture that is closest to your natural hair. This creates a seamless transition into the extensions. As you progress, incorporate the different textured extensions at various intervals, ensuring an even distribution throughout the braiding process.
It’s also important to pay attention to how you blend the textures. The key is to align the braids carefully so that they flow together naturally. This may involve adjusting the tension and spacing of your braids to ensure a smooth combination of textures.
Finally, when integrating multiple textures, ensure that you style the braids appropriately to enhance the overall look. Using curling rods or a flat iron on specific sections can help to create cohesive waves or curls that flow beautifully, adding depth and dimension to your hairstyle.
How to Experiment with Colour and Highlights in Your Micro Braids?
Experimenting with colour and highlights in micro braids can dramatically transform your look. When choosing colours, consider your skin tone and personal style. Bold, vibrant colours can make a statement, while subtle highlights can add dimension and depth to your hairstyle.
One effective method is to use temporary hair dye or washable hair chalk for a fun, non-permanent change. This allows you to experiment with different colours without the commitment. When applying colour, focus on the ends of the braids for a gradient effect, or integrate highlights throughout for a more blended appearance.
Another option is to use coloured hair extensions. Blend these extensions seamlessly with your natural hair to ensure a smooth transition. This method can give you the freedom to play with multiple colours and styles without altering your natural hair.
Lastly, maintain the vibrancy of your colour by using colour-safe shampoos and conditioners. This will help to prevent fading while keeping your micro braids looking fresh and beautiful. By incorporating colour thoughtfully, you can create micro braids that are as unique as you are.
Mastering the Art of Seamless Cuts in Your Braids
Mastering the art of seamless cuts within micro braids requires both skill and practice. To create smooth transitions, start by carefully planning where you want to integrate the cuts. Snipping small sections at a time ensures that you maintain control and precision throughout the process.
When you begin to cut, use sharp scissors to achieve clean lines. Avoid making large, blunt cuts, as these can create noticeable edges. Instead, focus on layering the cuts to create a gradual effect that flows with the braids.
As you work, regularly check your progress in a mirror to ensure you're on track. This allows you to assess how well the cuts are blending with the overall braid design. If you find any inconsistencies, take the time to make adjustments as needed, ensuring that the cuts appear seamless and intentional.
Lastly, consider experimenting with different cutting techniques, such as point cutting or feathering, to create soft edges within the braids. With practice, you’ll gain the confidence to create beautifully integrated cuts that enhance the overall aesthetic of your micro braids.
How to Enhance Styles with Decorative Elements?
Enhancing your micro braids with decorative elements can add a personalised flair that elevates your hairstyle. Beads are a popular choice; they come in various shapes, sizes, and colours, allowing you to express your individuality. Threading beads onto the ends of the braids can create eye-catching accents that draw attention to the design.
You may also want to consider using hair cuffs or clips that complement your style. These metallic or decorative pieces can be placed at various points along the braids to create a unique look. Ensure that they are spaced evenly for a balanced appearance.
Incorporating ribbons or fabric strips within your braids can also add texture and colour. This technique allows for a playful and creative expression of your personal style. Tie or weave the ribbons into the braids for a beautiful contrast.
Finally, don’t hesitate to mix and match different elements. Combining beads, clips, and ribbons can lead to a striking and cohesive style that sets your micro braids apart. By thoughtfully incorporating decorative elements into your hairstyle, you’ll create a look that is truly your own.
FAQs: Your Questions Answered
What are micro braids?
Micro braids are tiny individual braids created by sectioning the hair into small portions. They offer a versatile and stylish appearance, suitable for a wide range of hair types.
How long do micro braids last?
Micro braids typically last between 6 and 8 weeks, depending on hair care and maintenance. Regular upkeep is essential for longevity.
Can I do micro braids on my own?
Yes, you can create micro braids on your own, though it may require practice. Starting with small sections and using proper techniques will help you achieve the desired look.
How do I maintain my micro braids?
Maintaining micro braids involves regular moisturising, gentle scalp massages, and wearing a silk scarf or bonnet at night to protect them while sleeping.
Can I wash my micro braids?
Yes, you can wash your micro braids with sulfate-free shampoo. It's essential to keep the scalp clean and free of buildup to maintain healthy hair.
What should I do if my braids are frizzy?
To manage frizz, apply a lightweight anti-frizz serum and avoid excessive manipulation of the braids, allowing them to maintain their shape.
How can I refresh my micro braids?
Refreshing micro braids can be achieved by gently washing them, applying a leave-in conditioner, and reworking the edges or first few inches if necessary.
What are the common issues with micro braids?
Common issues include frizz, loose braids, uneven sections, and scalp irritation. Addressing these promptly will help maintain the integrity of the braids.
Can I colour my micro braids?
Yes, you can colour your micro braids using temporary hair dye or coloured extensions, adding dimension and vibrancy to your hairstyle.
When should I remove my micro braids?
It's best to remove micro braids after 6-8 weeks to prevent hair damage and maintain scalp health, paying attention to any signs of irritation.
Comments are closed